Understanding the different types of lighting
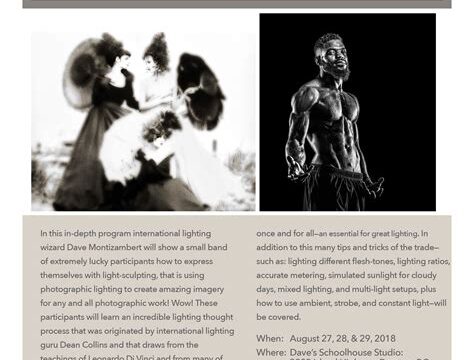
Lighting is a crucial element in any form of art or photography. It has the power to transform a scene, evoke emotions, and highlight specific details. In order to master the art of lighting, it’s important to understand the different types of lighting and how they can be used to enhance your craft. Let’s delve into the various types of lighting techniques and explore their effects in this blog post.
Natural Lighting:
Natural lighting, as the name suggests, refers to the use of sunlight to illuminate a scene. It is known for its soft and diffused quality, which creates a natural and warm ambiance. Natural lighting is often used in outdoor photography and is ideal for capturing landscapes, portraits, and still life images. The direction and intensity of natural light can vary throughout the day, offering photographers a wide range of creative possibilities.
Artificial Lighting:
Artificial lighting, on the other hand, involves the use of man-made light sources such as studio lights, flash units, and continuous lighting. Unlike natural lighting, artificial lighting gives photographers more control over the intensity, direction, and color temperature of the light. This allows for precise adjustments to match the desired mood or atmosphere of the scene. Artificial lighting is commonly used in studio photography, fashion shoots, and product photography.
Ambient Lighting:
Ambient lighting refers to the general illumination in a given area. It sets the overall tone and brightness of a scene. Ambient lighting can be provided by natural light sources, such as windows or skylights, or by artificial light sources, such as ceiling lights or lamps. Understanding ambient lighting is essential as it forms the base layer of lighting in a composition and affects the perception of other light sources within the scene.
Spotlighting:
Spotlighting involves focusing a strong beam of light onto a specific subject or area within a scene. This technique creates a dramatic effect by highlighting the subject and leaving the surrounding areas in shadow. Spotlights are often used in theater productions, concerts, and portrait photography to draw attention to the main subject or to create a sense of depth and dimension.
Conclusion:
Understanding the different types of lighting is essential for any artist or photographer. Whether you work with natural lighting, artificial lighting, or a combination of both, being aware of their unique characteristics and effects will allow you to manipulate light to achieve your desired results. Experiment with various lighting techniques and explore how they can transform your craft. By mastering the art of lighting, you will be able to create captivating and visually stunning images.
Choosing the right lighting equipment for your craft
When it comes to choosing the right lighting equipment for your craft, there are several important factors to consider. The lighting equipment you select has a significant impact on the overall quality and aesthetic of your work. It can enhance the mood and atmosphere, highlight specific details, and even create a sense of drama. In this blog post, we will explore the different types of lighting equipment available and provide some tips to help you make the best choice for your craft.
Firstly, it’s important to understand the different types of lighting equipment that are commonly used. Key lights, also known as primary lights, are the main source of illumination and provide the majority of light in a scene. Fill lights, on the other hand, help to evenly illuminate the subject and reduce shadows created by the key light. Backlights are placed behind the subject to separate them from the background and add depth to the image. Finally, accent lights are used to highlight specific areas or objects within the frame.
When choosing lighting equipment, consider the purpose of your craft and the desired effect you want to achieve. If you are working with still photography, a studio lighting kit with adjustable strobe lights may be the best option. These lights allow for precise control over the intensity and direction of the light, making it easier to create the desired mood and atmosphere. For videography or live streaming, continuous lighting options such as LED panels or softboxes can provide consistent illumination without the need for frequent adjustments.
Additionally, think about the size and portability of the lighting equipment. If you often work on location or need to transport your equipment frequently, portable and lightweight options may be more practical. Alternatively, if you have a dedicated studio space, larger lighting fixtures and stands may be suitable.
- Consider the purpose: Determine the purpose of your craft and the desired effect you want to achieve.
- Choose the right type: Understand the different types of lighting equipment available and select the ones that best suit your needs.
- Think about portability: Consider the size and weight of the equipment, especially if you frequently work on location.
- Consider your budget: Set a budget for your lighting equipment and explore options within that range.
| Pros | Cons |
|---|---|
| Studio lighting kits: Provide precise control over lighting; ideal for still photography. | Studio lighting kits: Can be expensive; require more setup time. |
| LED panels: Energy-efficient; provide continuous lighting for videography. | LED panels: May produce harsh shadows; limited control over intensity. |
| Softboxes: Produce soft and diffused light; suitable for portrait photography. | Softboxes: Bulkier compared to other options; may require additional stands. |
Remember, choosing the right lighting equipment for your craft is a personal decision that depends on your specific needs and preferences. Experiment with different setups and techniques to find what works best for you. Investing in high-quality lighting equipment can greatly enhance the overall quality of your work and help you achieve the desired results.
Exploring various lighting techniques and their effects
Lights, camera, action! In the world of photography and cinematography, lighting plays a crucial role in creating captivating visuals. It is the art of using light to enhance the subject, set the mood, and convey a message. With countless lighting techniques at your disposal, you can take your craft to new heights. In this blog post, we will delve into the fascinating world of lighting and explore various techniques that can help you create stunning and impactful images.
1. High Key Lighting: This technique involves using a lot of light to create a brightly lit scene. It is often characterized by minimal shadows and high levels of overall brightness. High key lighting is commonly used in fashion photography or in situations where a light and airy atmosphere is desired.
2. Low Key Lighting: On the other end of the spectrum, we have low key lighting. This technique employs a minimal amount of light, resulting in a scene that is predominantly dark with strong shadows. Low key lighting can create a mysterious and dramatic effect, often used in film noir or horror genres to evoke an intense emotional response from the viewer.
3. Rembrandt Lighting: Named after the famous Dutch painter, Rembrandt lighting is characterized by a small triangle of light on the subject’s cheek, opposite the light source. This technique adds depth and dimension to the subject’s face, creating a three-dimensional effect. Rembrandt lighting is commonly used in portrait photography to achieve a classic and timeless look.
- 4. Silhouette: Silhouette lighting involves placing the light source behind the subject, resulting in a darkened outline against a brighter background. This technique can create a sense of mystery or anonymity, leaving much to the viewer’s imagination.
- 5. Backlighting: Backlighting is when the main light source is placed behind the subject, illuminating it from the back. This technique can create a halo effect and add a sense of depth and separation between the subject and the background.
- 6. Split Lighting: In split lighting, the subject’s face is divided into equal halves – one side is fully lit, while the other remains in shadow. This technique can create a striking and dramatic effect, emphasizing the subject’s features in a unique way.
| Lighting Technique | Effect |
|---|---|
| High Key Lighting | Bright and airy atmosphere |
| Low Key Lighting | Mysterious and dramatic |
| Rembrandt Lighting | Classic and timeless look |
| Silhouette | Mystery and anonymity |
| Backlighting | Halo effect and depth |
| Split Lighting | Striking and dramatic |
These are just a few examples of the many lighting techniques available to photographers and cinematographers. Each technique brings its own unique effect and can greatly impact the visual narrative of your work. Experimenting with different lighting techniques is essential in finding your own style and creating powerful imagery that resonates with your audience. So grab your camera, start playing with lights, and let your creativity shine!
Mastering the use of natural light in your craft
Natural light is a powerful tool that can greatly enhance the quality of your craft. Whether you are a photographer, painter, or any other type of visual artist, understanding how to master natural light can take your work to the next level. In this blog post, we will explore the different techniques and strategies you can employ to make the most of natural light and create stunning art.
One of the first things to understand when working with natural light is the different times of day and how they can affect the quality of light. Golden hour, for example, refers to the period shortly after sunrise or before sunset, when the sun is low in the sky and the light is warm and soft. This is often considered the best time for outdoor photography and can create a beautiful, ethereal glow in your craft. On the other hand, midday light is harsher and more direct, often causing harsh shadows and high contrast. Understanding how these different times of day can impact your craft is essential in mastering natural light.
Another important aspect of using natural light effectively is learning how to manipulate it to your advantage. You can experiment with different techniques such as backlighting to create a halo effect around your subject, or using diffusers to soften the light and reduce harsh shadows. Additionally, reflectors can be used to bounce light back onto your subject, filling in shadows and adding a touch of brightness. These techniques allow you to have more control over the natural light and create the desired effect in your craft.
Lastly, don’t be afraid to embrace the imperfections that natural light can bring. Shadows and highlights can add depth and dimension to your craft, creating a sense of realism that artificial lighting sometimes lacks. Rather than trying to eliminate every shadow or highlight, try to incorporate them into your composition in a way that enhances the mood and atmosphere of your work. Remember, mastering natural light is a continuous learning process, so don’t be afraid to experiment and find what works best for your craft.
- Understand the different times of day and how they affect the quality of light
- Experiment with techniques such as backlighting, diffusers, and reflectors
- Embrace the imperfections of natural light and incorporate them into your craft
| Pros | Cons |
|---|---|
| Creates warm and soft light during golden hour | Harsh shadows and high contrast during midday |
| Allows for more artistic interpretation | Requires good understanding and timing |
| Brings depth and realism to your craft | Requires adaptability to changing conditions |
Learning how to manipulate artificial lighting for desired results
When it comes to photography or any other craft that involves lighting, understanding how to manipulate artificial lighting is crucial. Artificial lighting refers to any form of lighting that is not natural, such as studio lights, flash units, or even household lamps. By effectively manipulating artificial lighting, you can create stunning images that have the desired results. In this blog post, we will explore some tips and techniques for mastering the art of manipulating artificial lighting.
One of the first things to consider when manipulating artificial lighting is the type of lighting equipment you have at your disposal. There are various options available, including continuous lighting, strobe lights, and even LED lights. Each type of lighting equipment has its own advantages and disadvantages, so it’s important to choose the right one for your specific needs. For example, continuous lighting is great for beginners as it allows you to see the immediate effect of the light on your subject. On the other hand, strobe lights are powerful and can freeze motion effectively. Consider your subject, shooting conditions, and the effect you want to achieve before selecting the appropriate lighting equipment.
Once you have the right lighting equipment, it’s time to start experimenting with different lighting techniques. Some popular techniques include using diffusers and reflectors to control the direction and intensity of the light, backlighting to create a dramatic effect, and even using colored gels to add a unique touch to your images. By understanding the various lighting techniques and their effects, you can effectively manipulate artificial lighting to achieve the desired results in your craft.
- Diffusers: These are used to soften and spread the light, reducing harsh shadows and creating a more flattering effect on your subject.
- Reflectors: Reflectors bounce light back onto your subject, helping to fill in shadows and create a more balanced lighting setup.
- Backlighting: This technique involves placing the light source behind your subject, creating a halo or rim of light around them. It adds depth and separation from the background.
- Colored gels: By placing colored gels over your lights, you can create a unique and artistic effect. Experiment with different colors to see what works best for your desired results.
Furthermore, understanding the impact of shadows and highlights is crucial when manipulating artificial lighting. Shadows and highlights add depth, dimension, and drama to your images. By strategically placing your lights and adjusting their intensity, you can accentuate certain features or create interesting patterns of light and shadow. Pay attention to the direction of light, as it can dramatically change the mood and atmosphere of your photographs.
| Lighting Technique | Effect |
|---|---|
| Short lighting | Creates a more dramatic effect by illuminating the side of the subject facing away from the camera |
| Split lighting | Divides the subject’s face into equal halves, with one side in shadow and the other in light, creating a visually striking effect |
| Rembrandt lighting | Named after the Dutch painter, Rembrandt, this technique involves illuminating the subject’s face at a 45-degree angle, with a small triangle of light appearing on the darker side of the face |
| Butterfly lighting | Creates a soft, flattering light by placing the key light above and directly in front of the subject’s face, resulting in a small shadow under the nose |
Remember, mastering the art of manipulating artificial lighting takes time and practice. Experiment with different techniques, equipment, and angles to develop your own unique style. By understanding how to manipulate artificial lighting, you can take your craft to the next level and create images with the desired results.
Understanding the impact of shadows and highlights in your work
Understanding the impact of shadows and highlights in your work is crucial for any artist or photographer. Shadows and highlights play a significant role in creating depth, dimension, and a realistic appearance in images. They add visual interest, enhance the subject’s shape, and contribute to the overall mood and atmosphere of the piece. By mastering the use of shadows and highlights, you can take your work to the next level and create more impactful and visually engaging pieces.
Shadows are created when an object blocks the path of light, resulting in a darker area where little to no light is present. They can add a sense of mystery, drama, and contrast to your work. Shadows can be soft or hard, depending on the distance between the light source and the subject. Soft shadows are created when the light source is large or diffused, while hard shadows are created when the light source is small or direct. Experimenting with different types of lighting and understanding the effects they have on your subject’s shadows can help you create different moods and atmospheres in your work.
On the other hand, highlights are areas in your work where light is the brightest, adding a sense of brightness, shine, and reflection. They can draw attention to specific areas of your image or object, emphasizing their shape and texture. Highlights can range from subtle and gentle to intense and bright, depending on the intensity and direction of the light source. By strategically placing highlights in your work, you can guide the viewer’s eye and create a focal point within the piece.
- Experiment with different light sources and angles to understand how they affect the shadows and highlights in your work.
- Pay attention to the intensity and direction of the light to create the desired mood and atmosphere in your piece.
- Use reflectors or diffusers to manipulate the shadows and highlights in your subject, achieving the desired effect.
- Consider the color temperature of the light source, as it can also impact the overall tone and feel of your work.
- Practice observing and studying how light interacts with objects in real life to better understand its impact on shadows and highlights in your work.
| Shadow | Highlight |
|---|---|
| Creates depth and dimension | Emphasizes shape and texture |
| Adds drama and contrast | Adds brightness and shine |
| Can be soft or hard | Can range from subtle to intense |
| Blocks direct light | Receives direct light |
Tips for effectively using light to enhance the mood and atmosphere
Lighting is one of the most important aspects of any creative craft, whether it be photography, videography, or even painting. The way light is used can greatly enhance the mood and atmosphere of a piece, bringing it to life and evoking certain emotions in the viewer. In this blog post, we will explore some valuable tips and techniques for effectively using light to enhance the mood and atmosphere in your work.
First and foremost, it is essential to understand the different types of lighting available to you. There are three main types: natural light, artificial light, and a combination of both. Natural light, as the name suggests, refers to the light that comes from the sun. It can create a warm and inviting atmosphere or a cool and dramatic one, depending on the time of day and weather conditions. Artificial light, on the other hand, is generated by man-made sources such as lamps and studio lighting. This type of light allows for more control and manipulation, making it ideal for creating specific moods and effects.
When choosing lighting equipment for your craft, it is essential to consider your specific needs and preferences. Different types of lighting equipment have different capabilities and strengths. For example, if you are a photographer working in a studio setting, you may opt for strobe lights or continuous lights with softboxes for a more controlled and consistent output. On the other hand, if you are a filmmaker shooting on location, you might lean towards portable LED lights that offer flexibility and ease of use.
- Experimentation is key when it comes to using light to enhance the mood and atmosphere in your work. Don’t be afraid to try different lighting angles, intensities, and colors to achieve the desired effect. Play around with both natural and artificial light sources to see how they interact and affect the mood.
- Consider the direction and quality of light. Front lighting, where the light source is in front of the subject, is often used for a well-lit and evenly exposed image. However, side lighting or backlighting can create more dynamic and dramatic effects. Additionally, the quality of light, such as soft or harsh lighting, can greatly impact the mood. Soft lighting tends to create a more gentle and romantic atmosphere, while harsh lighting can evoke a sense of tension or drama.
- Highlight and accentuate key elements in your work by strategically placing light sources. Whether it’s highlighting the contours of a subject’s face in portrait photography or focusing on specific elements in a still life painting, using light to draw attention can add depth and visual interest to your craft.
| Tips for effectively using light to enhance mood and atmosphere: |
|---|
| • Understand the different types of lighting and their characteristics |
| • Choose the right lighting equipment for your specific needs |
| • Experiment with different lighting angles, intensities, and colors |
| • Consider the direction and quality of light |
| • Highlight and accentuate key elements in your work |
Remember, mastering the use of light to enhance the mood and atmosphere in your craft takes practice and experimentation. Keep exploring and pushing the boundaries of what light can do for your work, and soon you’ll be able to create captivating pieces that evoke the desired emotions in your audience.
Frequently Asked Questions
Q: What are the different types of lighting?
A: The different types of lighting include natural light, artificial light, and different lighting techniques such as backlighting, side lighting, and front lighting.
Q: How do I choose the right lighting equipment for my craft?
A: To choose the right lighting equipment, consider factors such as the desired brightness, color temperature, and control options. It’s also important to consider the size and weight of the equipment in relation to your craft.
Q: What are some common lighting techniques and their effects?
A: Common lighting techniques include backlighting, which creates a halo effect, side lighting, which adds depth and texture, and front lighting, which evenly illuminates the subject. Each technique produces different effects and can enhance the mood and atmosphere of your craft.
Q: How can I master the use of natural light in my craft?
A: To master the use of natural light, it’s important to understand how it changes throughout the day and how it interacts with different surfaces. Experiment with different times of day, angles, and locations to find the best natural lighting for your craft.
Q: How can I manipulate artificial lighting for my desired results?
A: To manipulate artificial lighting, you can adjust the intensity, position, and direction of the lights. You can also use diffusers and reflectors to soften or redirect the light. Experiment with different setups and settings to achieve the desired results.
Q: What is the impact of shadows and highlights in my work?
A: Shadows and highlights add depth, contrast, and dimension to your work. They can create a sense of drama, emphasize certain elements, and add visual interest. Understanding how to control and manipulate shadows and highlights can greatly enhance your craft.
Q: What are some tips for effectively using light to enhance the mood and atmosphere?
A: To effectively use light to enhance the mood and atmosphere, consider factors such as color temperature, positioning, and intensity. Experiment with different lighting setups and techniques to achieve the desired mood and atmosphere in your craft.


