Welcome to our blog, where we will explore the wonderful world of woodworking and guide you on your journey to creating beautiful and functional pieces. Whether you are a beginner or an experienced woodworker, having the right tools in your garage workshop is essential. In this post, we will discuss the must-have tools that will not only make your woodworking projects easier but also elevate the quality of your craftsmanship. Additionally, we will delve into creating a functional and organized workspace, understanding woodworking techniques and joinery, mastering different types of wood finishes, and troubleshooting common woodworking problems. Moreover, we will explore step-by-step beginner projects for skill development and advanced woodworking projects to challenge yourself. Lastly, we will emphasize the importance of building a community of woodworkers through networking and collaboration. So let’s get ready to unleash our creativity and dive into the art of woodworking!
Essential Tools for Your Garage Workshop
The garage workshop is a haven for DIY enthusiasts and woodworking hobbyists alike. To make the most out of your space, it is important to have the essential tools that can help you tackle various projects efficiently and effectively. Whether you are just starting out or have been woodworking for years, having the right tools in your garage workshop can make all the difference in the quality of your work. In this blog post, we will explore the essential tools that every garage workshop should have.
One of the first tools that should be on your list is a workbench. A sturdy and well-built workbench provides a solid foundation for all your woodworking projects. It allows you to securely clamp down materials, provides a flat and level surface for precision work, and offers storage space for your tools. A workbench can be custom-built or purchased pre-made, depending on your preferences and skill level.
Another essential tool for your garage workshop is a miter saw. A miter saw is crucial for making accurate crosscuts, miter cuts, and bevel cuts in lumber and other materials. It is a versatile tool that can be used for various woodworking projects, from building furniture to installing trim. Look for a miter saw with adjustable angles and a laser guide for precise cutting.
Having a table saw is also a must-have for any serious woodworker. A table saw is used for ripping, crosscutting, and making bevel cuts in wood. It is a powerful tool that can handle large and heavy pieces of wood with ease. Look for a table saw with a sturdy table, a powerful motor, and safety features such as a blade guard and a riving knife.
- Clamps: Clamps are essential for holding pieces of wood together securely while glue dries or when making precise cuts. They come in various sizes and types, such as bar clamps, pipe clamps, and spring clamps. Having a variety of clamps in your workshop will ensure that you have the right tool for every project.
- Chisels: Chisels are indispensable for shaping and carving wood. They come in different shapes and sizes, such as bench chisels, mortise chisels, and paring chisels. Investing in high-quality chisels will make your woodworking projects easier and more enjoyable.
- Hand planes: Hand planes are used for smoothing and flattening wood surfaces. They can be used to remove rough spots, correct imperfections, and achieve a polished finish. Look for hand planes with sharp blades and adjustable controls for precision planing.
| Tool | Description |
|---|---|
| Workbench | A sturdy and well-built workbench provides a solid foundation for all your woodworking projects. It allows you to securely clamp down materials, provides a flat and level surface for precision work, and offers storage space for your tools. |
| Miter saw | A miter saw is crucial for making accurate crosscuts, miter cuts, and bevel cuts in lumber and other materials. It is a versatile tool that can be used for various woodworking projects, from building furniture to installing trim. |
| Table saw | A table saw is used for ripping, crosscutting, and making bevel cuts in wood. It is a powerful tool that can handle large and heavy pieces of wood with ease. |
These are just a few of the essential tools that every garage workshop should have. Building a collection of quality tools over time will enable you to take on more complex projects and achieve professional-looking results. Remember to always prioritize safety when working with woodworking tools and wear appropriate protective gear. With the right tools and a passion for woodworking, your garage workshop can become a place where creativity and craftsmanship flourish.
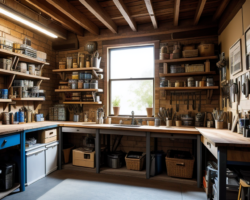
Creating a Functional and Organized Workspace
Having a functional and organized workspace is essential for any woodworking enthusiast. Not only does it make your projects more efficient, but it also provides a safe and enjoyable environment to work in. Whether you have a dedicated workshop or a small corner in your garage, here are some essential tools and tips to help you create a workspace that maximizes productivity and creativity.
1. Bench or Workbench: A sturdy and spacious work surface is the foundation of any woodworking workspace. Invest in a high-quality bench or workbench that offers stability and durability. Make sure it has enough space for your projects and has built-in storage options for your tools and supplies.
2. Tool Storage: Keeping your tools organized and easily accessible is crucial for a functional workspace. Consider installing wall-mounted pegboards, shelves, or custom tool cabinets to store your hand tools, power tools, and accessories. This not only helps you save time searching for tools but also reduces the risk of accidents caused by cluttered work areas.
3. Lighting: Good lighting is essential for precision work and preventing eye strain. Install bright LED lights or adjustable task lighting to illuminate your workspace. Position the lights strategically to eliminate shadows and provide ample visibility for intricate woodworking tasks.
4. Dust Collection System: Woodworking generates a lot of dust and debris, which can be harmful to your health and contribute to a messy workspace. Invest in a dust collection system or a shop vacuum to remove dust and maintain a clean and healthy environment. Consider adding dust collection attachments to your power tools for efficient dust extraction.
| Essential Tools: | Tips for an Organized Workspace: |
|---|---|
| – Circular saw | – Create designated storage areas for different materials and supplies |
| – Power drill | – Label and categorize your storage bins and shelves |
| – Chisels | – Use wall-mounted organizers for frequently used hand tools |
| – Clamps | – Establish a workflow and keep your workspace clean after each project |
| – Router | – Invest in a comfortable and ergonomic work chair |
By implementing these essential tools and tips, you can create a functional and organized workspace that enhances your woodworking experience. Remember to regularly declutter, clean, and maintain your workspace to ensure optimal efficiency and safety. With a well-designed workspace, you’ll be able to tackle any woodworking project with ease and precision.
Understanding Woodworking Techniques and Joinery
Woodworking is a popular and rewarding hobby that allows individuals to create beautiful and functional items out of wood. However, to achieve successful woodworking projects, it is essential to have a solid understanding of various woodworking techniques and joinery methods. These techniques and joinery are the building blocks of woodworking, enabling woodworkers to construct sturdy and long-lasting pieces. In this blog post, we will explore some of the essential woodworking techniques and joinery methods that every aspiring woodworker should know.
One of the most fundamental woodworking techniques is measuring and marking. Accurate measurement is crucial in woodworking to ensure that all the pieces fit together properly. Woodworkers use both measuring tools such as tape measures and rulers, as well as marking tools like pencils and marking knives to mark out their pieces before cutting and shaping them. Proper measuring and marking technique helps in achieving precision and accuracy in woodworking projects.
In addition to measuring and marking, another important woodworking technique is cutting and shaping. Woodworkers use a variety of tools such as saws, chisels, and planes to cut and shape their wood pieces. The choice of tool depends on the desired outcome and the type of cut or shape needed. For example, a crosscut saw is used to cut wood across its grain, while a coping saw is used for intricate and curved cuts. Skillful cutting and shaping techniques are essential for creating smooth, clean, and accurate woodworking joints.
Woodworking joinery refers to the methods used to connect and secure wood pieces together. There are numerous types of woodworking joints, each with its own unique characteristics and applications. Some common types of woodworking joints include butt joints, dado joints, dovetail joints, and mortise and tenon joints. Different joints are used for varying purposes, such as improving strength, enhancing aesthetics, or allowing for disassembly. Understanding the strengths and weaknesses of different joinery methods is crucial for achieving strong and durable woodworking projects.
In conclusion, understanding woodworking techniques and joinery is essential for anyone interested in pursuing woodworking as a hobby or profession. Knowledge of measuring and marking, cutting and shaping, as well as various joinery methods, allows woodworkers to create high-quality and finely crafted pieces. Whether you are a beginner or an experienced woodworker, continually expanding your understanding of these techniques and joinery methods will enable you to tackle more complex projects and push the boundaries of your woodworking skills.
Mastering Different Types of Wood Finishes
When it comes to woodworking, one of the key aspects that can truly elevate a project is the finish applied to the wood. Wood finishes not only protect the wood from damage but also enhance its natural beauty, creating a polished and professional look. However, with so many different types of wood finishes available, it can be overwhelming to know which one to choose. In this blog post, we will explore the various types of wood finishes and provide insights on how to master each one.
Listed below are some of the essential wood finishes that every woodworker should be familiar with:
- Shellac: Shellac is a traditional yet versatile wood finish. It is made from a resin secreted by the lac bug and can be used as a sealer, primer, or topcoat.
- Varnish: Varnish is a durable and protective wood finish that provides a glossy, clear, or amber tone to the wood surface.
- Stain: Stain is commonly used to add color to the wood while enhancing its grain pattern. It is available in many shades and can be either oil-based or water-based.
Another important aspect to consider when mastering wood finishes is understanding the techniques involved in their application. Different types of finishes require different application methods, such as brushing, spraying, or wiping. It is essential to follow the manufacturer’s instructions and practice on scrap wood before applying the finish to your actual project.
To further enhance your knowledge of wood finishes, it is crucial to be familiar with the table below, which highlights the pros and cons of each type:
| Wood Finish | Pros | Cons |
|---|---|---|
| Shellac | Fast-drying, easy to repair, imparts a warm tone | Not as durable as other finishes, susceptible to water and heat damage |
| Varnish | Highly durable, provides excellent protection, enhances wood grain | Long drying time, requires adequate ventilation, can turn yellow over time |
| Stain | Enhances wood grain, adds color, available in various shades | Requires a topcoat for protection, can be difficult to apply evenly |
By understanding the different types of wood finishes and their benefits, you can choose the most suitable finish for your woodworking projects. Whether you are looking for a glossy, natural, or colorful finish, there is a wood finish out there that can help you achieve your desired result. Remember to experiment, practice, and seek guidance from experienced woodworkers to truly master the art of wood finishes.
Step-by-Step Beginner Projects for Skill Development
When starting out on a woodworking journey, it can be overwhelming to know where to begin. That’s why step-by-step beginner projects are a great way to develop your skills and confidence in the craft. These projects are designed to be simple yet practical, allowing you to learn and practice essential woodworking techniques while creating something useful. In this blog post, we will explore a few exciting beginner projects that will help you hone your skills and lay a solid foundation for your woodworking journey.
List of Step-by-Step Beginner Projects:
- Wooden Cutting Board
- Tool Tote
- Wall Shelf
- Picture Frame
- Small Storage Box
1. Wooden Cutting Board:
One of the easiest projects for beginners is a wooden cutting board. Start by selecting a hardwood like maple or walnut, as they are durable and suitable for this purpose. Cut the wood to your desired size and smooth the edges. Then, using a router or sandpaper, round the corners and sand the surface until it’s smooth. Apply a food-safe finish like mineral oil or beeswax, and your cutting board is ready to use!
2. Tool Tote:
A tool tote is not only functional but also a great way to learn basic joinery techniques. Begin by cutting the sides, bottom, and handle from a sturdy wood, such as pine or plywood. Use simple joinery methods like butt joints or rabbet joints to assemble the pieces together. Sand the rough edges and apply a protective finish. Now you have a convenient tool tote to keep your woodworking essentials organized.
3. Wall Shelf:
A wall shelf is an excellent project for beginners to practice measuring, cutting, and assembly skills. Start by determining the dimensions and design of your shelf. Cut the wood to size and use pocket-hole joinery or dowels to join the pieces together. Sand the surface and add a beautiful wood finish of your choice. Mount the shelf on the wall, and it’s ready to display your favorite items!
4. Picture Frame:
Creating a picture frame allows beginners to experiment with mitered joints, which add an elegant touch to the project. Measure and cut the wood at 45-degree angles to create four pieces for the frame. Use clamps and wood glue to secure the corners together. Sand the frame and apply a finish to enhance its appearance. Insert your favorite picture, and voila! You have a handmade frame to cherish.
5. Small Storage Box:
A small storage box is an ideal project to practice basic box construction techniques. Cut pieces for the sides, bottom, and lid of the box. Use dovetail joints or simple butt joints to assemble the box. Sand the surfaces, apply a stain or paint for a decorative touch, and add a latch or hinges if desired. Now you have a versatile storage solution for small items.
These step-by-step beginner projects offer a fantastic opportunity to develop your woodworking skills while creating functional and aesthetically pleasing items. Remember to start with proper safety precautions and gradually progress to more complex projects as you gain confidence. Happy woodworking!
Advanced Woodworking Projects to Challenge Yourself
Woodworking is a craft that allows for continuous learning and growth. Once you have mastered the basics and completed a few beginner projects, you may find yourself wanting to take on more challenging tasks. This is where advanced woodworking projects come into play. These projects require a higher level of skill and expertise, but they also offer a great opportunity to push your boundaries and explore new techniques. In this article, we will explore some exciting advanced woodworking projects that will truly challenge you and help you take your woodworking skills to the next level.
1. Intricate Wood Carvings
If you have a passion for detail and enjoy the art of carving, intricate wood carvings may be the perfect challenge for you. This advanced woodworking project involves using different carving tools to create intricate designs and patterns on a piece of wood. From decorative ornaments to intricate relief carvings, the possibilities are endless. You’ll need a steady hand and a sharp set of carving tools to master this craft, but the end result is truly rewarding.
2. Fine Furniture Making
If you want to challenge yourself with a project that combines both technical skill and artistic design, fine furniture making is a great choice. This advanced woodworking project involves creating high-quality, custom-made furniture pieces from scratch. From intricately designed chairs and tables to elegant cabinets and chests, the world of fine furniture making offers a wide range of challenging projects. You’ll need to master techniques such as joinery, veneering, and finishing to create truly stunning pieces.
3. Advanced Woodturning
Woodturning is a fascinating woodworking technique that involves shaping wood by rotating it on a lathe while using various cutting tools. While beginner woodturning projects may focus on creating simple bowls or pens, advanced woodturning allows you to explore complex shapes and designs. Challenge yourself by creating intricate woodturning projects like lidded boxes, hollow forms, or even segmented vessels. The key to mastering advanced woodturning is to develop a deep understanding of tool control and patience.
Conclusion
Embarking on advanced woodworking projects can be a thrilling and rewarding experience. It allows you to challenge yourself, expand your skillset, and create truly exceptional pieces of craftsmanship. Whether you choose to delve into intricate wood carvings, fine furniture making, or advanced woodturning, these projects will push your boundaries and help you achieve new levels of mastery in the art of woodworking.
Troubleshooting Common Woodworking Problems
Woodworking can be a rewarding and fulfilling hobby, but like any craft, it has its fair share of challenges. As you work on various projects, you may encounter common woodworking problems that can hinder your progress and result in frustration. However, with the right knowledge and tools at your disposal, these problems can be easily resolved. In this blog post, we will explore some of the most common woodworking issues and provide troubleshooting tips to help you overcome them.
One of the most common woodworking problems is wood warping. This occurs when the wood bends or twists due to changes in humidity or improper drying. To prevent warping, it is essential to choose properly seasoned wood and store it in a controlled environment. Additionally, sealing the wood with a finish can help minimize the effects of moisture. If you encounter warped wood, you can try using weights or clamps to straighten it. Another option is to apply moisture to the concave side and heat to the convex side to correct the warp.
Another issue that woodworkers often face is joint failure. This can happen when the glue used to join two pieces of wood does not bond properly or when the joint is not designed to withstand the intended load. To avoid joint failure, always ensure that the surfaces you are joining are clean, flat, and free from any excessive moisture or debris. Additionally, consider using appropriate joinery techniques, such as dovetail joints or mortise and tenon joints, which provide stronger and more durable connections. If you do encounter a failed joint, carefully clean off the old glue and reapply a fresh adhesive.
One of the most frustrating problems in woodworking is tearout. This occurs when the wood fibers tear away along the grain, leaving an unsightly and jagged edge on your workpiece. To prevent tearout, it is crucial to use sharp and high-quality cutting tools, such as chisels, hand planes, or saws. Additionally, working with a slower feed rate and using a backing board can help minimize tearout. If tearout does occur, you can try using a sharp chisel or sandpaper to smooth out the affected area and conceal the damage.
To summarize, woodworking problems are part of the learning process, and every woodworker encounters them at some point. By understanding common issues like wood warping, joint failure, and tearout, you can troubleshoot and overcome these challenges effectively. Remember to use properly seasoned wood, choose appropriate joinery techniques, and work with sharp tools to minimize these problems. With practice and perseverance, you will become more skilled at troubleshooting and enjoy a smoother woodworking experience.
Building a Community of Woodworkers – Networking and Collaboration
Woodworking is not just a solitary activity; it is a craft that brings people together and fosters a sense of community. Whether you are a beginner or an experienced woodworker, networking and collaboration can greatly enhance your skills and knowledge in this field. By connecting with fellow woodworkers, you can learn new techniques, share ideas, and even collaborate on projects.
One of the essential tools for building a community of woodworkers is networking. This involves actively seeking out opportunities to meet and connect with other woodworkers, both online and offline. Online platforms, such as woodworking forums and social media groups, provide a convenient way to interact with fellow enthusiasts from around the world. You can share photos of your projects, ask for advice, and engage in discussions on various woodworking topics. It is also beneficial to attend woodworking workshops, seminars, and trade shows, where you can meet like-minded individuals and forge valuable connections.
Collaboration is another key aspect of building a woodworking community. By collaborating with other woodworkers, you can pool your skills, resources, and ideas to create something truly remarkable. This could involve joining forces on a large-scale project, such as building a piece of furniture or a workshop, or simply exchanging knowledge and techniques in a more informal setting. Collaborative projects not only broaden your skill set, but they also provide an opportunity to learn from others and gain new perspectives on woodworking.
- Networking allows you to connect with fellow woodworkers online and offline.
- Collaboration helps you share skills, resources, and ideas.
- Attending workshops and trade shows is a great way to meet like-minded individuals.
In addition to networking and collaboration, being an active member of a woodworking community can offer numerous benefits. These communities often organize events, such as woodworking competitions and exhibitions, where you can showcase your craftsmanship and receive feedback from others. They also provide a support system, where you can seek advice and guidance on various woodworking issues. Furthermore, being part of a community gives you access to a wealth of knowledge and experience that can aid in your personal and professional growth as a woodworker.
| Benefits of Building a Woodworking Community |
|---|
| Opportunities to showcase your work and receive feedback |
| Access to a support system for advice and guidance |
| Enhanced personal and professional growth |
Building a community of woodworkers is not just about honing your skills or expanding your network. It is about being part of something greater and sharing a passion for woodworking with others who understand and appreciate it. So, take the initiative, join woodworking communities, and embrace the power of networking and collaboration. Together, we can create a thriving community of woodworkers that pushes the boundaries of creativity and craftsmanship.
Frequently Asked Questions
1. What are the essential tools needed for a garage workshop?
Some essential tools for a garage workshop include a workbench, table saw, mitre saw, drill press, power sander, and various hand tools like a hammer, screwdrivers, and clamps.
2. How can I create a functional and organized workspace in my garage workshop?
To create a functional and organized workspace, start by decluttering and organizing your tools and materials. Utilize storage solutions like shelves and bins, and consider installing a pegboard or tool wall for easy access to frequently used tools.
3. What are some common woodworking techniques and joinery methods?
Common woodworking techniques include cutting, drilling, shaping, and sanding. Joinery methods like mortise and tenon, dovetail, and finger joints are often used to create strong and secure connections between wood pieces.
4. How can I master different types of wood finishes?
To master different wood finishes, start by understanding the characteristics of different finishes like varnish, stain, and oil. Practice applying finishes on scrap wood, and experiment with different techniques like brushing, wiping, or spraying to achieve desired results.
5. What are some step-by-step beginner projects for skill development in woodworking?
Some step-by-step beginner projects include building a simple bookshelf, a wooden serving tray, or a small storage box. These projects allow you to practice basic woodworking skills like measuring, cutting, and joining pieces together.
6. What are some advanced woodworking projects to challenge yourself?
Advanced woodworking projects can include creating intricate furniture pieces like a dining table with detailed inlays, a wooden rocking chair, or a custom-built cabinet. These projects require advanced joinery techniques and precise woodworking skills.
7. How can I troubleshoot common woodworking problems?
To troubleshoot common woodworking problems like gaps in joints or uneven finishes, ensure that your tools are properly calibrated and sharp. Take the time to properly prepare and plan your project, and if issues arise, research and seek advice from experienced woodworkers.